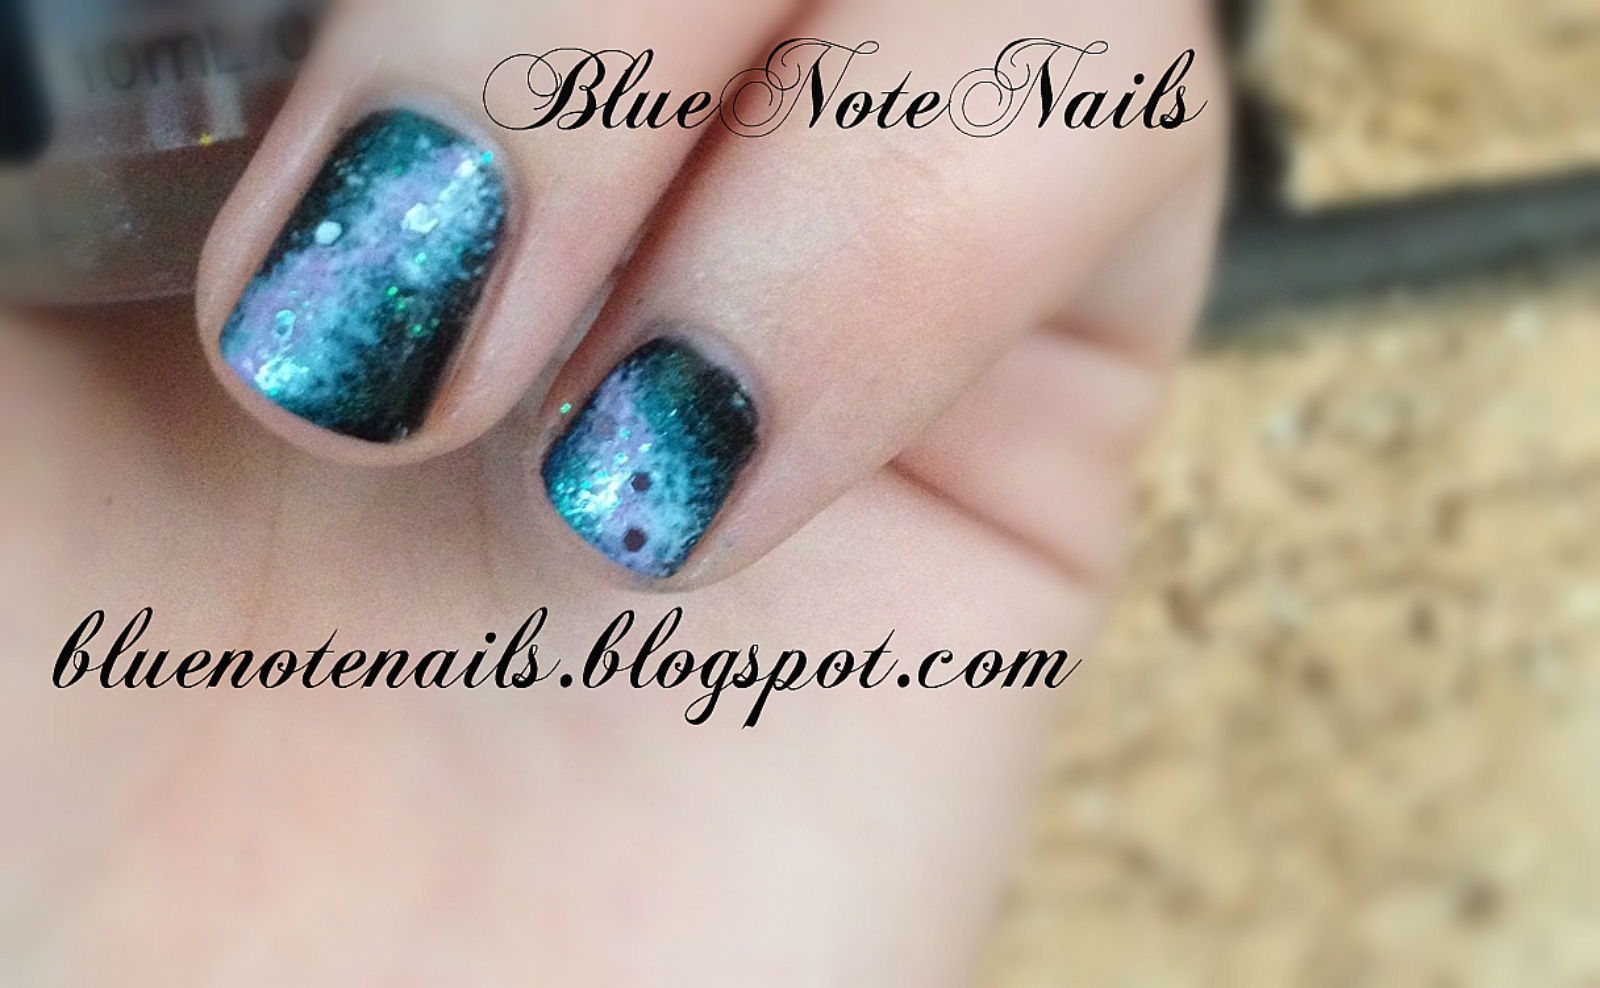
Today I will show you how to recreate the galaxy nails that I posted yesterday!
.JPG)
.JPG)
I'm not exactly rich, far from it actually, so until I win the lottery all of my tutorials will be using inexpensive items, most of which you will probably already have.
You Will Need:
- A sponge (I use a kitchen sponge)
- Toothpicks - for cleanup
- Makeup remover pads or cotton balls - for cleanup
- A piece of plastic (I use some plastic packaging, but it could be anything - a plastic sleeve, a glad bag (aka ziploc bag), or the lid of an old take away container)
- Glitter - I used larger blue glitter (abt 2 mm across), and tiny holographic glitter.
- And of course - nail polish!
- 1 dark polish for the background (I used Revlon Top Speed: Black Star)
- 3 or 4 lighter colours for the galaxy.
- 1 clear top coat (I use Australis top & base coat)
I used:
.JPG)
Mint Green - Australis in Sweetpea
Pastel Purple -The Face Shop in PP401
Very light blue/purple - Revlon in Clou
Step 1
Paint your nails with your base colour. My previous attempt I used a glitter black with small silver particles, I would recommend not overdoing it with glitter in this step - it really takes away from the galaxy look. A nice black or even dark purple would look good.
I used Revlon Black Star:
.JPG)
It just looks like a light, shiny black in the shade, but in the sun it subtly sparkles.
.JPG)
Step 2
Ensure your nails are completely dry before beginning this step. I painted the base in the morning, and then did a few things throughout the day before I sat down to start the galaxy in the afternoon. You don't have to wait quite that long, but they should definitely be nice and dry - and not dentable.
Take your sponge:
I use a regular kitchen sponge, the no-name kind you buy in a pack of 6 at Woolworths (supermarket).

I've tried using a makeup sponge before, and found that it really didn't apply enough polish at all and just soaked most of it up.
I simply tear off the scourer pad, and then cut a few pieces off:

Now take your piece of plastic (mine is a bit I saved from my bundle monster stamp package), and drip some nail polish onto it. Start with your darkest colour.

I only drip out a little because I've noticed some polishes dry up very quickly, and its easier just to add more as you go than trying to work with gluggy half-dry polish.
Take a piece of sponge, and using a corner, dab it into the nail polish. Dab off any excess on the plastic.

I work the sponge across each nail as a line, just gently dabbing the polish on. I would recomend doing the lines is different directions on different nails - my first attempt all nails were very similar, and it took away from the galaxy effect.
I reload the sponge before starting on each nail:

You can see where I've dabbed off my excess around where the polish was.
Step 3
Wait for your sponging to dry before starting on the next colour. This doesnt take very long at all - a couple of minutes dry time should suffice.
Now take each colour and sponge on, from darkest to lightest. For each colour I use, I use a smaller area of the sponge so that the new colour doesn't completely cover the previous colour.
.JPG)
Follow the sponged line you already created, trying not to stray outside that line too much - a little bit outside looks good, a lot looks messy.
.JPG)
You can see in this photo how much smaller area of sponge I use as I move onto the lighter colours.

The final colour is sponged on very lightly, just highlighting the middle areas of the galaxy - where there would be the highest concentration of stars.
Step 4
And now for the glitter!
Wait until your lovely galaxies are dry before starting this step!
I started with larger pieces of light blue glitter. I only wanted 2 - 3 pieces on each nail, so I used a toothpick to apply them.
As you will need a wet top coat, I recommend doing this step one nail at a time - that is how I work. Pour a little glitter onto a work area, a piece of paper or anywhere is fine. I just used the top of a notebook that was close by.
.JPG)
Paint your finished design with top coat. Dip the end of a toothpick ever-so-lightly in the nail polish, you don't want a blob on the end. Wipe off any excess.
Using your toothpick, gently touch a piece of glitter - it will stick to the end. Place the glitter into the wet top coat gently - you don't want to ruin your nails. You just need to lightly touch your nail with the glitter, it should stick.
I applied 2 - 3 of these larger pieces in the brightest areas of the design, focusing on the inner part of the galaxy.
.JPG)
Who knew taking pictures of glitter was so difficult?
Then, on the same nail, I took my white holographic glitter and gently shook a very small amount into the center of the lines. Last time I tried galaxy nails I killed them with glitter and it just ruined the look.

That's how I gently shook some onto my nails. I couldn't get a good shot
because I don't have three hands.
Once you are finished, let it dry. This will depend on the kind of top coat you used. Once dry, apply another top coat or 2, depending on how much the surface needs smoothing out.
Step 5
Lastly, it's time for cleanup. By this point, you are probably covered in glitter and nail polish. I can't help with the glitter, it sticks to me like crazy too. But I can help with the polish.

Gather your toothpicks and makeup pads (or cotton balls). I'm going to try to explain how I do this, forgive me if it's a little confusing. My auntie taught me this trick when I was about 14, because I used to get polish everywhere. I'd probably have had better luck dipping my whole hand into polish. (Thanks Auntie Lisa!)
She taught me with cotton balls, but because I cannot STAND to touch them, I do not buy them. Even thinking about them now is making me feel all squicky. (If you are using cotton balls, you can skip the first part)
Take your makeup pad and pull out the soft cottony stuff in the middle:
.JPG)
Take your toothpick and dip it into the cottony stuff, gently pulling away a small amount:
.JPG)
Roll the cotton around the toothpick between your thumb and forefinger:

Now you should have something which looks like this:

Now you're all ready to start cleanup! Dip into nail polish remover and be careful near your nails. I use more cotton on the toothpick for clean up of skin around the nails, then less as I get closer to the nail and around the cuticle.
Each time I need a new piece I simply slide off the used cotton and roll on some fresh cotton.
Heres the result after cleaning:

So there you have it! Galaxy Nails!
.JPG)
.JPG)
Wow, that took way longer than I thought it would. Now I need to figure out how to put all the pictures together into one informative step-by-step pic..! Maybe another time. Goodnight!
No comments:
Post a Comment